Micro Dialogs
Last updated: February 2026
Micro Dialogs are the structural foundation of every coaching built in the CoachStudio Coaching Editor.
They define how conversations are grouped, organised, and maintained — independently of the actual coaching flow experienced by participants.
This section introduces the concept of Micro Dialogs, explains how they are structured, and shows how modular dialogue design helps keep complex coachings understandable and maintainable.
1. Micro Dialogs – Concept and Purpose
1.1 What Are Micro Dialogs?
A Micro Dialog is a self-contained conversational unit within a coaching.
It consists of messages, decision points, and events that together fulfil a specific purpose.
Typical examples of Micro Dialogs include:
- setting a goal
- collecting user input
- guiding a reflection
- providing feedback
- performing a short check-in
Instead of building a coaching as one long, linear conversation, coachings are composed of multiple Micro Dialogs that can be combined and reused.
1.2 Why Coachings Are Built from Micro Dialogs
As coachings grow, they often include:
- multiple user paths
- recurring questions
- variations depending on context, timing, or user state
Without Micro Dialogs, this quickly leads to:
- very long, hard-to-understand dialogues
- duplicated content
- high effort when making changes
Micro Dialogs allow you to:
- break complex coachings into manageable parts
- work on one topic without affecting others
- maintain and update content more efficiently
They are designed to support clarity, reuse, and scalability.
1.3 Micro Dialogs vs. Coaching Flow
It is important to distinguish between:
- dialogue structure in the editor
- actual coaching flow for participants
Micro Dialogs help organise content for authors and editors.
They do not define the order in which participants experience the coaching.
The coaching flow is controlled by:
- rules
- conditions
- decision points
- events
The Micro Dialog structure exists purely to help humans design and maintain the coaching.
2. Structuring Coachings with Micro Dialogs
Micro Dialogs are most powerful when used in a modular way.
This means designing dialogues as independent building blocks instead of tightly coupling all content together.
2.1 Modular Dialogue Design
Modularisation means:
- each Micro Dialog has a clear purpose
- dialogues can be understood independently
- dialogues can be reused in different contexts
A modular coaching is easier to:
- understand
- extend
- debug
- update later on
You can think of Micro Dialogs as chapters in a book or scenes in a film — each with its own role, but meaningful only as part of the whole.
2.2 Parent Dialogues and Sub-Dialogues
Micro Dialogs can be organised hierarchically using parent dialogues and sub-dialogues.
This hierarchy:
- exists only inside the editor
- has no impact on the coaching flow
Its sole purpose is to improve orientation and maintainability.
2.2.1 Parent Dialogues
Parent Dialogues act as thematic containers.
They group related Micro Dialogs under a shared topic or domain.
Examples:
- Motivation
- Physical Activity
- Nutrition
- Reflection & Feedback
A Parent Dialogue answers the question:
What is this group of dialogues about?
It does not determine when or how dialogues are shown to participants.
2.2.2 Sub-Dialogues
Sub-Dialogues represent meaningful sub-units within a topic.
They are useful when:
- a topic becomes complex
- different aspects of a topic should be separated
- multiple people work on the same coaching
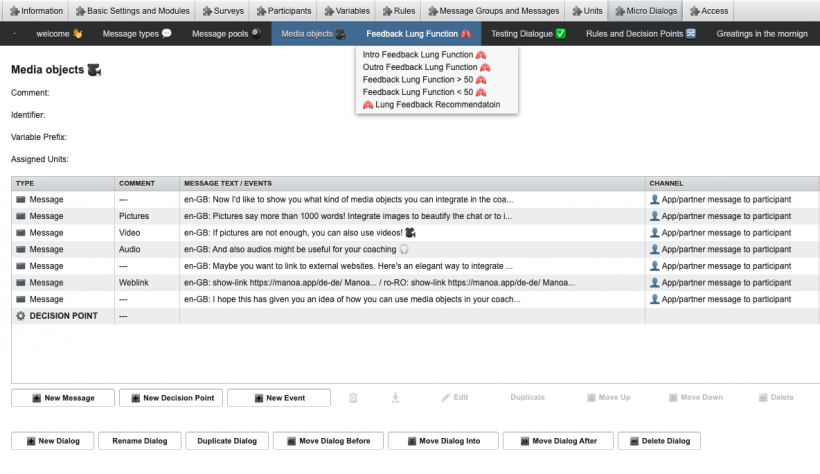
Example structure:
- 👟 Physical Activity
- 🎯 Goal Setting
- 🥊 Barrier Reflection
- 🧐 Follow-up Check-in
This structure helps authors quickly find, understand, and modify dialogue content.
Here is an example of a parent dialogue with sub-dialogues:
2.3 Sub-Modularisation: When to Split Dialogues
Creating a separate Micro Dialog or sub-dialogue is recommended when at least one of the following applies:
- the dialogue has a clearly defined task
- the dialogue could be reused elsewhere
- the dialogue is likely to change in the future
- the dialogue contains more than just a few messages
- the dialogue can be explained independently from other dialogues
If none of these apply, keeping the content within an existing dialogue is often sufficient.
2.4 Cascading Dialogues: Reuse Instead of Duplication
Some dialogues are useful in multiple places within a coaching.
Typical examples:
- motivation check-ins
- reflection questions
- goal reviews
- short feedback loops
Instead of duplicating these dialogues, they should be:
- created once
- reused by cascading into them from different parts of the coaching
This approach:
- reduces maintenance effort
- ensures consistent wording and logic
- prevents subtle inconsistencies
Dialogues that act as supporting or service elements are strong candidates for cascading.
2.5 Guiding Principles for Modular Design
When designing Micro Dialogs, follow these principles:
- keep dialogues simple
- avoid duplication
- make future changes easy
Modular design supports all three.
3. Creating and Configuring Micro Dialogs
3.1 Creating a New Micro Dialog
To create a new Micro Dialog:
- Navigate to the Micro Dialogs tab within your coaching.
- Click New Dialog.
- Enter a name for the dialogue.
- Confirm to create the dialogue.
Using clear names — optionally with emojis 👍 — improves orientation, especially in large coachings.
3.2 Dialogue Properties
Each Micro Dialog can be configured using the following properties:
- Comment
Internal notes describing the purpose or logic of the dialogue. - Identifier (optional)
A unique identifier that can be referenced in coaching logic. - Variable Prefix (optional)
Restricts variable names generated within this dialogue. Used for local variables. - Assigned Units (optional)
Assigns the dialogue to specific units.
Learn more about Units and local variables in: Units Documentation
4. Organising Micro Dialogs in the Editor
The editor provides several functions to organise Micro Dialogs hierarchically.
These functions affect only the editor structure, not the coaching flow.
Creating Parent Dialogues
To create a Parent Dialogue:
- Select the leftmost Micro Dialog (“.”) next to the START dialogue.
- Click New Dialog.
- Enter a name and optional comment.
The new dialogue will act as a container for sub-dialogues.
Creating Sub-Dialogues
To create a Sub-Dialogue:
- Select the Parent Dialogue.
- Click New Dialog.
- Enter the dialogue details.
Sub-dialogues can themselves have sub-dialogues, allowing deeper structures if needed.
Moving Dialogues
The following functions help organise dialogues:
- Move Dialog Before
- Move Dialog After
- Move Dialog Into
These actions help structure the editor view but do not change runtime behaviour.
Renaming Dialogues
Renaming dialogues helps keep the structure understandable, especially as coachings grow over time.
Duplicating Dialogues
Duplicating a dialogue creates a copy including all its content.
Duplicated dialogues should always be renamed immediately to avoid confusion and accidental errors.
Deleting Dialogues
Deleting a dialogue permanently removes it from the coaching.
This action cannot be undone.
5. Building Dialogue Content
Once Micro Dialogs are created and structured, the next step is to define their actual content.
Dialogue content consists of messages, decision points, and events, which together define how users interact with the coaching.
5.1 Core Elements of Dialogue Content
Each Micro Dialog can contain the following elements:
- Messages
Textual or media-based outputs shown to participants. - Decision Points
Elements that evaluate conditions and determine which path the coaching continues on. - Events
Triggers that initiate Service Channel News, or other system actions.
These elements are listed and managed in the Message Configuration Table.
5.2 The Message Configuration Table
The Message Configuration Table provides an overview of all elements within a Micro Dialog.
Each row represents one message, decision point, or event.
The table includes the following fields:
- Type
Indicates whether the row represents a message, decision point, or event. - Comment
Internal notes for editors. Not visible to participants. - Message Text / Events
The message content shown to participants or the event that is triggered. - Channel
Defines how the message is delivered (e.g. app or partner messaging). - Answer Type
Specifies how the participant can respond. - Result Variable
Stores the participant’s response, if applicable. - Randomisation Group
Assigns the message to a random or looped message group. - Command Message
Indicates whether the message triggers a system action. - Contains Media Content
Shows whether the message includes images, audio, or video. - Contains Link to Survey
Indicates whether a survey is linked. - Contains Rules
Displays the number of conditions controlling message execution.
5.3 Messages
Messages are the primary way the coaching communicates with participants.
A message can:
- display text
- include placeholders for variables
- include media
- expect a participant response or not
Messages may also be conditional, meaning they are only sent when all defined rules are fulfilled.
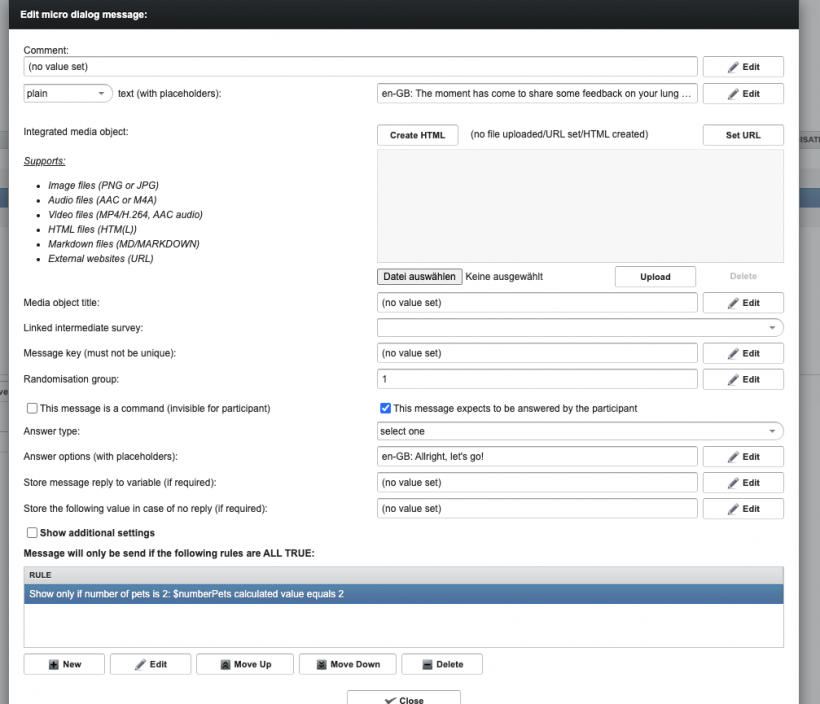
This bubble shows only if the value of $numberPets is exactly 2
5.4 Decision Points
5.4 Decision Points
Decision Points control how a Micro Dialog branches and continues.
They evaluate predefined rules and determine which path the coaching follows next.
A Decision Point can:
- control the flow within a Micro Dialog
- control the flow between Micro Dialogs
- create or modify variables
- combine multiple rules using AND / OR logic
A Decision Point itself does not display content to participants.
It operates purely on logic and routing.
5.4.1 What Is a Decision Point?
A Decision Point is a logical branching element within a Micro Dialog.
It evaluates one or more conditions.
Depending on whether those conditions evaluate to TRUE or FALSE, the dialogue continues along different paths.
Decision Points can:
- contain multiple rules
- combine rules using AND and/or OR logic
- evaluate stored variables
- define new calculated variables
They are processed from top to bottom in the order they appear in the Message Configuration Table.
5.4.2 Defining the Flow Within a Micro Dialog
Within a Micro Dialog, Decision Points allow you to:
- control the sequence of messages
- skip messages conditionally
- branch based on user responses
- ensure that only relevant content is shown
Arranging the Sequence of Messages and Decision Points
The system processes all elements from top to bottom.
This means:
- the visible order in the interface defines the execution order.
To arrange the sequence:
- Select the message, decision point, or event.
- Use Move Up or Move Down to reposition it.
The sequence determines how the dialogue unfolds logically.
Defining Message Rules
Message rules determine whether a specific message is sent.
A message is only sent if ALL defined conditions are true.
To define a message rule:
- Open the message you want to edit.
- Scroll to the section:
"Message will only be sent if the following rules are ALL TRUE:" - Click + New to add a rule.
- Configure the rule:
- Select the variable (e.g.
$userResponse) - Choose a condition type (e.g.
equals,greater than) - Define the comparison value (e.g.
2)
- Select the variable (e.g.
- Optionally add a descriptive comment.
- Close and save the rule.
Additional rules can be added as needed.
Important:
- Only predefined variables can be used.
- Unknown variables are rejected by the system.
- New variables must be created in the Variables section before use.
Jumping to Another Message Within a Micro Dialog
Decision Points can redirect the dialogue to another message within the same Micro Dialog.
This allows:
- skipping intermediate messages
- branching dynamically
- handling alternative paths
To configure a jump:
- Click + New Decision Point.
- Add a descriptive comment.
- Add one or more rules.
- Define:
- Jump to dialogue message if TRUE
- Jump to dialogue message if FALSE
- Close the window to save.
The dialogue will immediately continue at the selected target message.
5.4.3 Defining the Flow Between Micro Dialogs
Decision Points can also control transitions between different Micro Dialogs.
There are two transition types:
- Jump
- Cascade
Jumping to Another Micro Dialog
When jumping:
- The current dialogue is exited.
- The coaching continues in the target dialogue.
- The original dialogue is not resumed.
Use this when:
- switching to a different phase of the coaching
- permanently transferring control
Steps:
- Select the starting Micro Dialog.
- Add a new Decision Point.
- Add optional rules.
- Select the target dialogue in
Jump to other dialogue if TRUE. - Close the window.
5.4.3.2 Cascading to Another Micro Dialog
When cascading:
- The system temporarily switches to another Micro Dialog.
- After the cascaded dialogue finishes, execution returns to the original dialogue.
- The coaching continues from the point it left.
Use this when:
- inserting reusable sub-dialogues
- embedding assessments or reusable modules
- structuring modular coaching elements
Steps:
- Select the starting Micro Dialog.
- Add a new Decision Point.
- Add optional rules.
- Select the target dialogue in
Cascade to other dialogue if TRUE. - Close the window.
5.4.4 Creating Variables in Decision Points
Decision Points can also create new variables through calculations.
This allows you to:
- compute values
- aggregate responses
- store derived metrics
- use calculated results in later rules
Variables must be predefined before being used in conditions.
5.4.5 Best Practices for Using Decision Points
- Keep branching logic readable and well-commented.
- Avoid deeply nested jumps when possible.
- Use cascading for reusable logic modules.
- Always consider the execution order (top to bottom).
- Test every branch explicitly.
Decision Points are powerful.
Used carefully, they enable modular, adaptive, and scalable coaching structures.
5.5 Events
Events are used to trigger system-level actions, such as:
- Service Channel News
- background processes
They allow coachings to interact with features beyond the chat conversation.
6. Creating Coaching Messages
6.1 Creating a New Message
To create a new message within a Micro Dialog:
- Select the Micro Dialog.
- Click New Message.
- Configure the message settings.
6.2 Message Text and Placeholders
Message text defines what participants see.
Variables can be inserted using placeholders, allowing messages to adapt dynamically based on previous input.
Example: Your average blood pressure was $bloodPressureAverage mmHg.
6.3 Message Format: Plain vs. HTML
- Plain
Use when the message contains no HTML formatting. - HTML
Use when formatting or links are included.
Selecting the correct format ensures proper rendering.
Message Format: Plain vs. HTML
| Format | Format | Example |
|---|---|---|
| Plain | Your blood pressure today was $bloodPressureAverage mmHg. | Your blood pressure today was $bloodPressureAverage mmHg. |
| HTML | <b>Your blood pressure today:</b> <i>$bloodPressureAverage</i> mmHg. <a href="https://example.com">Learn more</a> |
Your blood pressure today: $bloodPressureAverage mmHg. Learn more |
6.4 Message Responses
Messages can optionally expect a participant response.
If a response is expected:
- the coaching can wait until the participant replies
- the reply can be stored in a variable
- the response can influence later logic
6.5 Message Rules
Rules define conditions under which a message is sent.
Important characteristics:
- all rules must be true for the message to be sent
- rules allow messages to be context-sensitive
- rules help avoid unnecessary or irrelevant messages
For a detailed guide on creating and using rules, see Rules.
7. User Responses and Answer Types
Selecting the correct answer type is essential for meaningful interaction and reliable data collection.
7.1 General Principles
When designing user responses:
- keep options clear and unambiguous
- avoid unnecessary complexity
- ensure the answer type fits the question
Please review the best practices for creating user responses.
7.2 Saving Responses to Variables
Participant responses can be stored in variables for later use.
For selection-based answers:
- each option can be mapped to a code
- the selected code is saved in the variable
For open input:
- the full input is stored directly
7.3 Input Formats (Answer Formats)
The following table shows all input formats that the coach can request.
| Input Format | Preview | Implementation in Coaching |
|---|---|---|
| Select One | 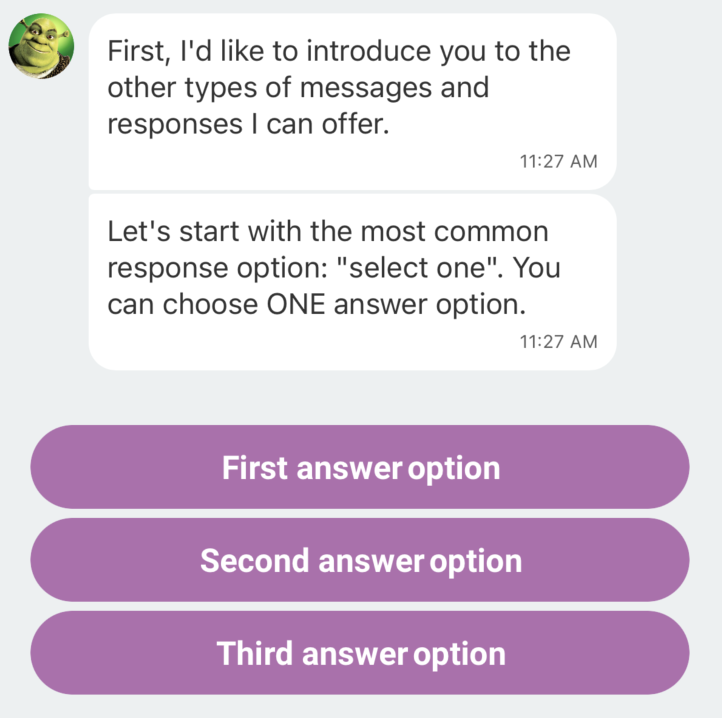 |
Displays a row of buttons from which exactly one can be selected. Each option has a display text (button) and a transmitted value (value). |
| Select Many | 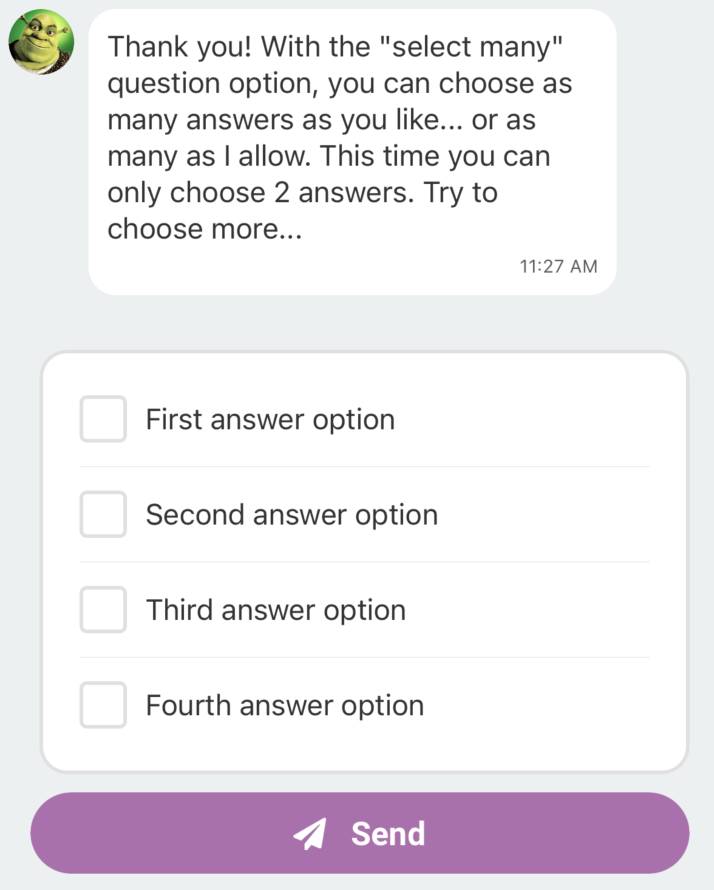 |
Multiple choice as a button group. Optional parameters min and max define how many answers must/can be selected. Prefixing an option's label with ! (exclamation mark followed by a space) marks it as an exclusive option (e.g. "None of the above"): selecting it deselects all other selected options, and selecting any other option deselects it. The ! prefix is stripped from the displayed label. |
| Free Text | 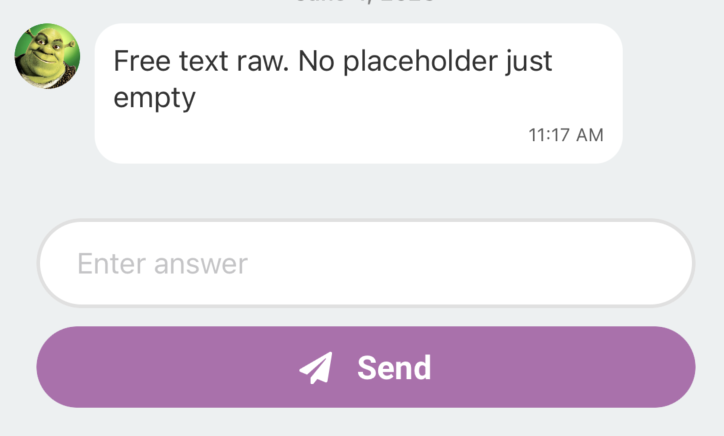 |
Single-line text input. Supports a placeholder text as well as textBefore/textAfter (via _ separator in the options). For AI-generated messages, ai-free-text is used instead. |
| Free Text Multiline | 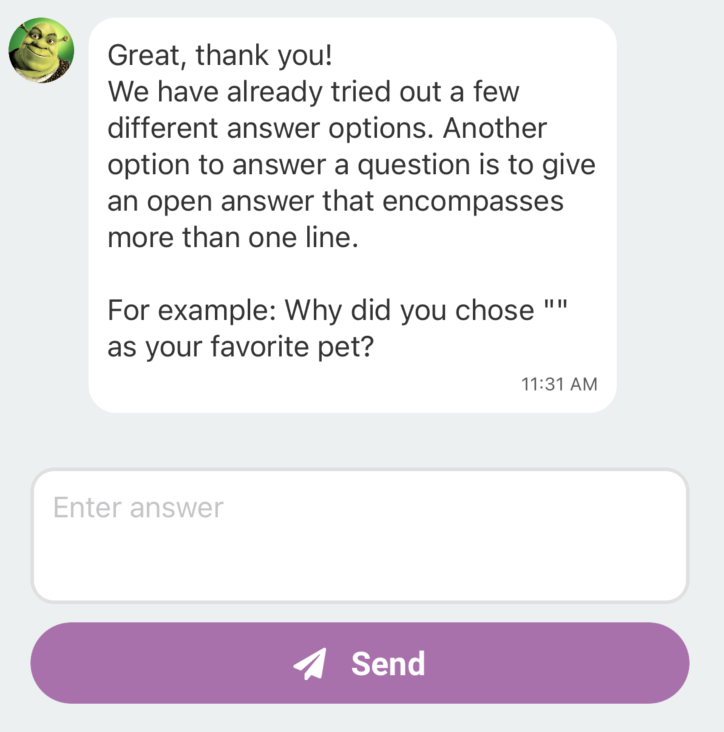 |
Multi-line text input. Identical to free-text but with multiline: true. Also supports ai-free-text for AI-generated messages. |
| Free Numbers | 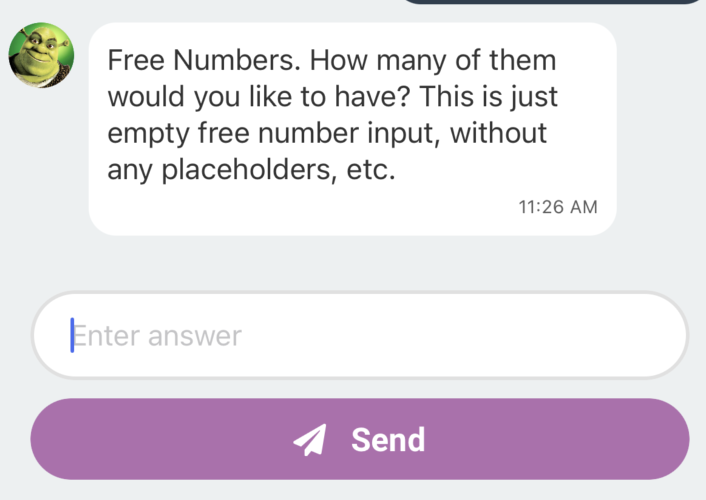 |
Numeric input (onlyNumbers: true). Supports optional min and max values as well as textBefore/textAfter via _ separator. |
| Date | 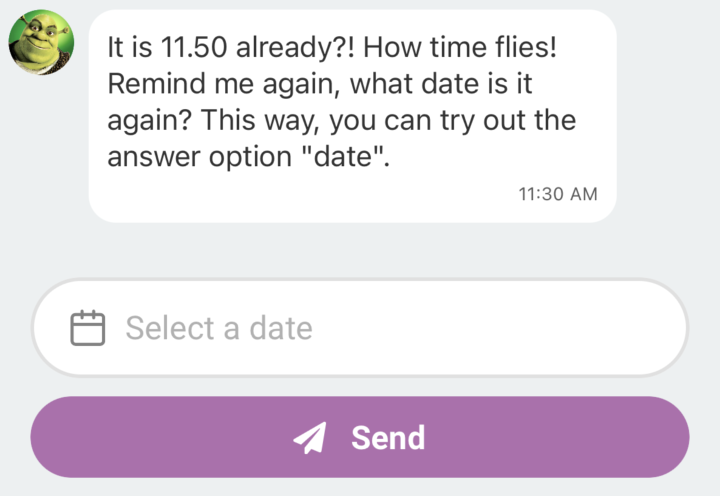 |
Date picker (mode: "date"). Optional parameters: placeholder, min, max. |
| Time | 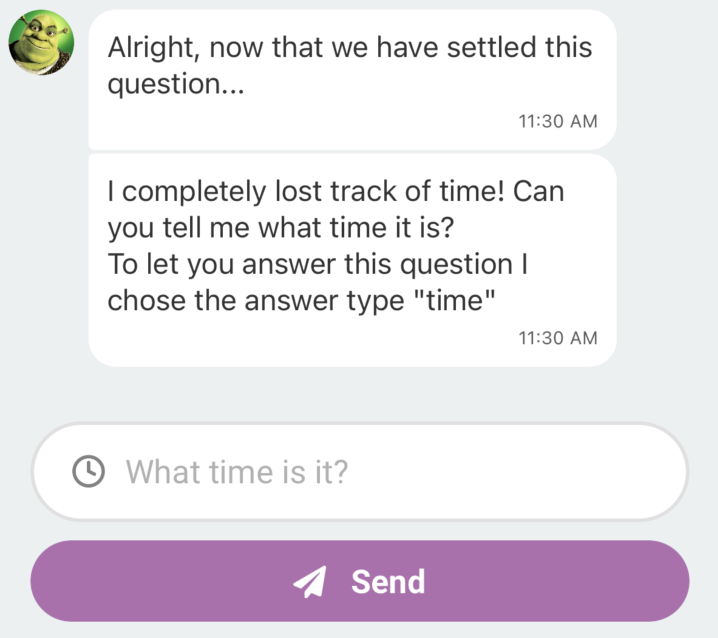 |
Time picker (mode: "time"). Optional parameters: placeholder, min, max. |
| Date and Time | 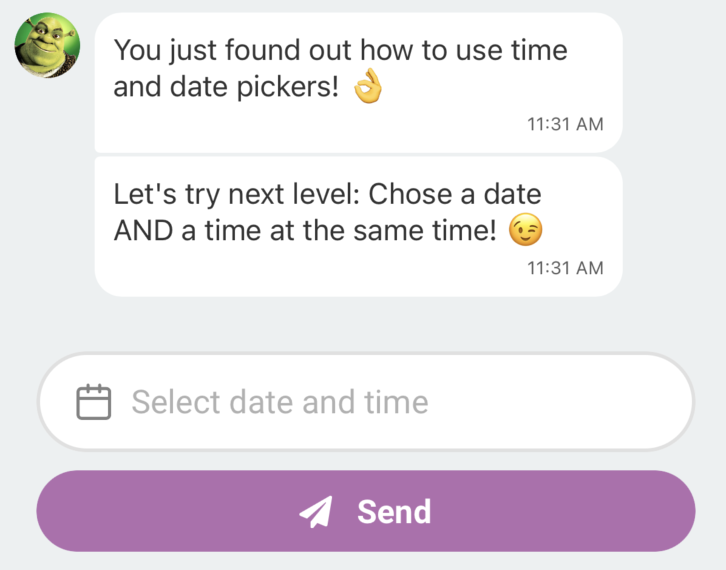 |
Combined date and time picker (mode: "datetime"). Optional parameters: placeholder, min, max. |
| Likert | 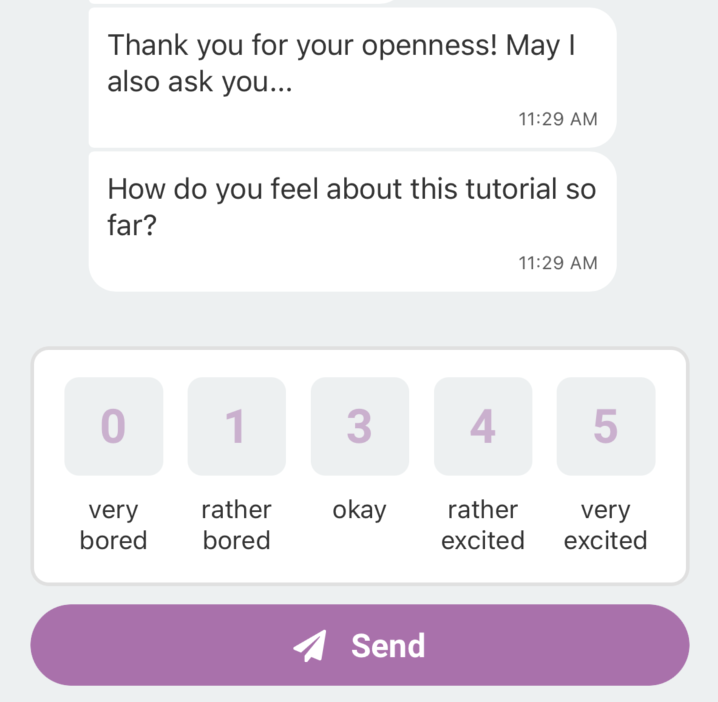 |
Likert scale with an explicit confirmation step. Each option has a display text (label) and a value (value). |
| Likert Silent | 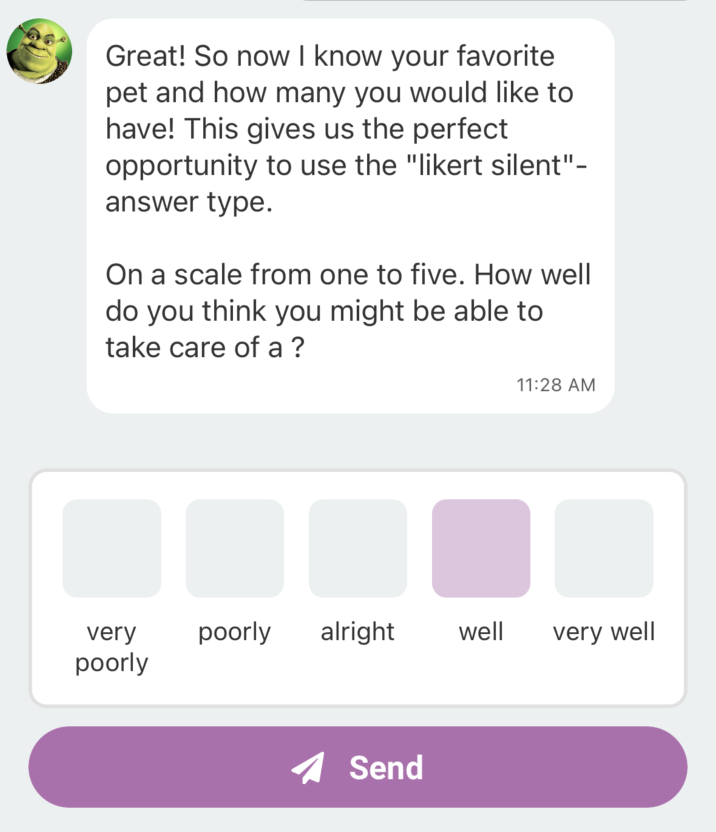 |
Likert scale that submits the answer immediately on tap, without confirmation. |
| Likert Slider | 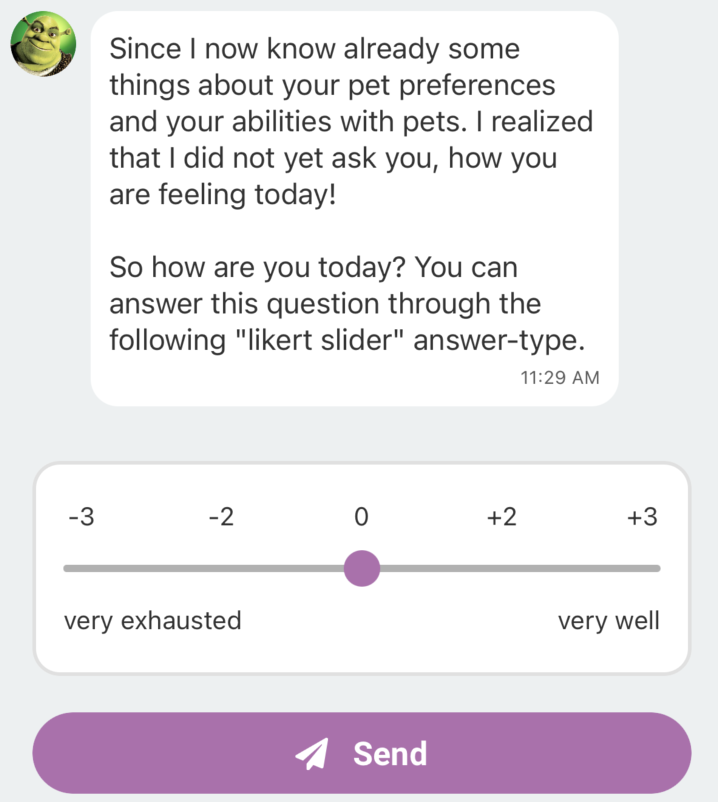 |
Likert scale as a horizontal slider with an explicit confirmation step. |
| Image | 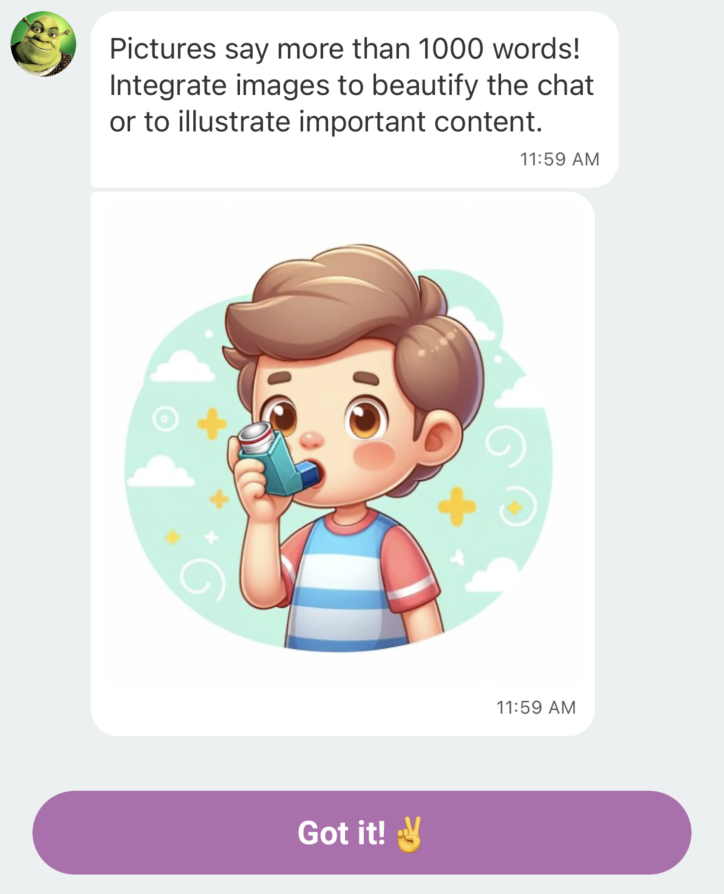 |
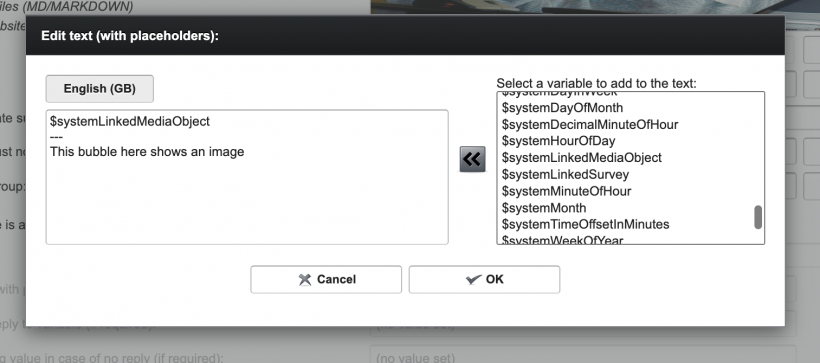
User can take a photo or upload one from the gallery. Optional: variable option specifies the target variable for the upload. The position of the media within the message bubble can be influenced using the variable $systemLinkedMediaObject. By default, the media always appears at the end of the bubble. |
| Audio | 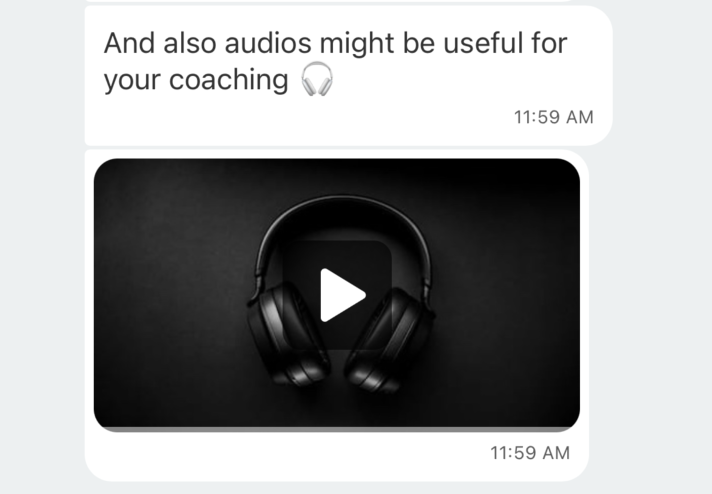 |
User can record and upload an audio clip. Optional: variable option specifies the target variable. The position of the media within the message bubble can be influenced using the variable $systemLinkedMediaObject. By default, the media always appears at the end of the bubble. |
| Video |  |
User can record and upload a video. Optional: variable option specifies the target variable. The position of the media within the message bubble can be influenced using the variable $systemLinkedMediaObject. By default, the media always appears at the end of the bubble. |
Implementation Examples
Copy the following templates directly into the options field of the corresponding input format.
Select One
First answer option:1
Second answer option:2
Third answer option:3
Select Many
First answer option:1
Second answer option:2
Third answer option:3
! Fourth answer option:4
Free Text
Name: _Free Text Multiline
This is a demo text and the next word _ can be entered by the user.Free Numbers
_ EURDate
Select date
min:03.03.2018
max:04.04.2018
Time
Select time
min:10
max:23.5
Date and Time
Select date & timeLikert
very bored:0
rather bored:1
okay:3
rather excited:4
very excited:5
Likert Silent
very bored:0
rather bored:1
okay:3
rather excited:4
very excited:5
Likert Slider
very bored:0
rather bored:1
okay:3
rather excited:4
very excited:5
7.4 Custom Answer Types
Custom answer types can be used for specialised input formats defined by the coaching creator.
8. Structural Message Patterns
Some message behaviours affect structure rather than content.
8.1 Randomized Messages
Randomized messages present one message from a defined group.
They are commonly used for:
- A/B testing
- content variation
- reducing predictability
Messages in a randomized group:
- must share the same group identifier
- must appear sequentially
Here is an example of how randomized messages appear in the editor:

8.2 Looped Messages
Looped messages present messages in a fixed sequence across multiple executions.
They are useful for:
- rotating content
- repeated check-ins
- long-running coachings
Looped message groups must:
- share the same identifier
- not start with the letter “r”
Here is an example of how looped messages appear in the editor:

8.3 Choosing the Right Pattern
Use:
- randomized messages for variation without order
- looped messages for controlled sequences
Avoid mixing both patterns unintentionally.
9. Media in Micro Dialogs
Media can be integrated directly into messages to enrich the coaching experience. Media should support the dialogue content, not replace clarity in message text.
To give users a permanent collection of audio, videos, links and infocards beyond the chat, use the Media Library: it is set up in the CoachStudio Designer and filled from your Micro Dialogs with Media Library commands.
9.1 Supported Media Types
- Images: PNG, JPG
- Audio: AA, M4A
- Video: MP4 (H.264, AAC audio)
9.2 Adding Media to Messages
To add media:
- Create or edit a message.
- Select the media file.
- Upload the file.
- Review the preview.
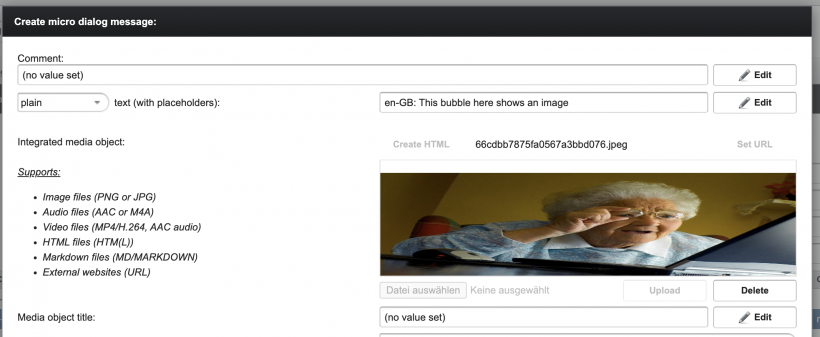
Media appears by default after the message text in the chat interface.
You can also set the position of the uploaded image via the variable $systemLinkedMediaObject